

Easter is that magical time of year when the flowers bloom, the days grow longer, and your sweet tooth starts to whisper its sweet little secrets again. Nothing screams spring quite like the delightful crunch and melt-in-your-mouth goodness of these Easter Nests, which bring together the richness of chocolate, the fun of colorful candy eggs, and the comforting texture of crispy wheat cereal. Trust me, after just one delightful bite, you’ll find yourself planning your next batch faster than you can say “bunny hop.”
As the aroma of melting chocolate fills your kitchen and the cheerful colors of candy eggs adorn your creations, it’s hard not to feel a rush of nostalgia. Perhaps you remember decorating Easter baskets as a child or sharing the joy of holiday traditions with loved ones. These Easter Nests are perfect for any spring celebration, family get-together, or even a quiet night in with a movie—because let’s be real, they taste just as delightful no matter the occasion.
Why You'll Love This Easter Nests
- This incredible Easter Nests transforms simple everyday ingredients into restaurant-quality flavors that will blow your mind completely.
- Foolproof recipe techniques guarantee perfect results every single time, making even novice cooks feel like professional chefs instantly.
- Stunning visual appeal with gorgeous colors and mouthwatering aromas creates the ultimate Instagram-worthy dish for any special occasion.
- Endlessly adaptable for different dietary needs while working beautifully for meal prep, date nights, or entertaining large groups effortlessly.
Ingredients for Easter Nests
Here’s what you’ll need to make this delicious Easter Nests:
1 cup semisweet chocolate chips – Opt for high-quality chips for the best melting and flavor. These will form the rich base of your nests.
2 cups shredded wheat cereal – Choose plain shredded wheat for that delightful crunch that holds everything together beautifully.
1 cup toasted coconut flakes – Adds a tropical flair and chewiness to the nests, making them even more irresistible.
1 cup colorful candy eggs – Whether you go for fruity jelly beans or chocolate eggs, these will make your nests pop with color and sweetness.
How to Make Easter Nests
Follow these simple steps to prepare this delicious Easter Nests:
Step 1: Melt the Chocolate
Start by placing the semisweet chocolate chips in a microwave-safe bowl. Heat them in the microwave in 30-second intervals. Give them a quick stir after each interval until they are completely smooth and melted. Be careful not to overheat; we want that perfectly silky chocolate!
Step 2: Coat the Cereal
Once the chocolate is nicely melted, add in the shredded wheat cereal. Gently fold the cereal into the chocolate, ensuring every little bit is well-coated. Think of it as giving each piece a cozy chocolate blanket—how delightful!
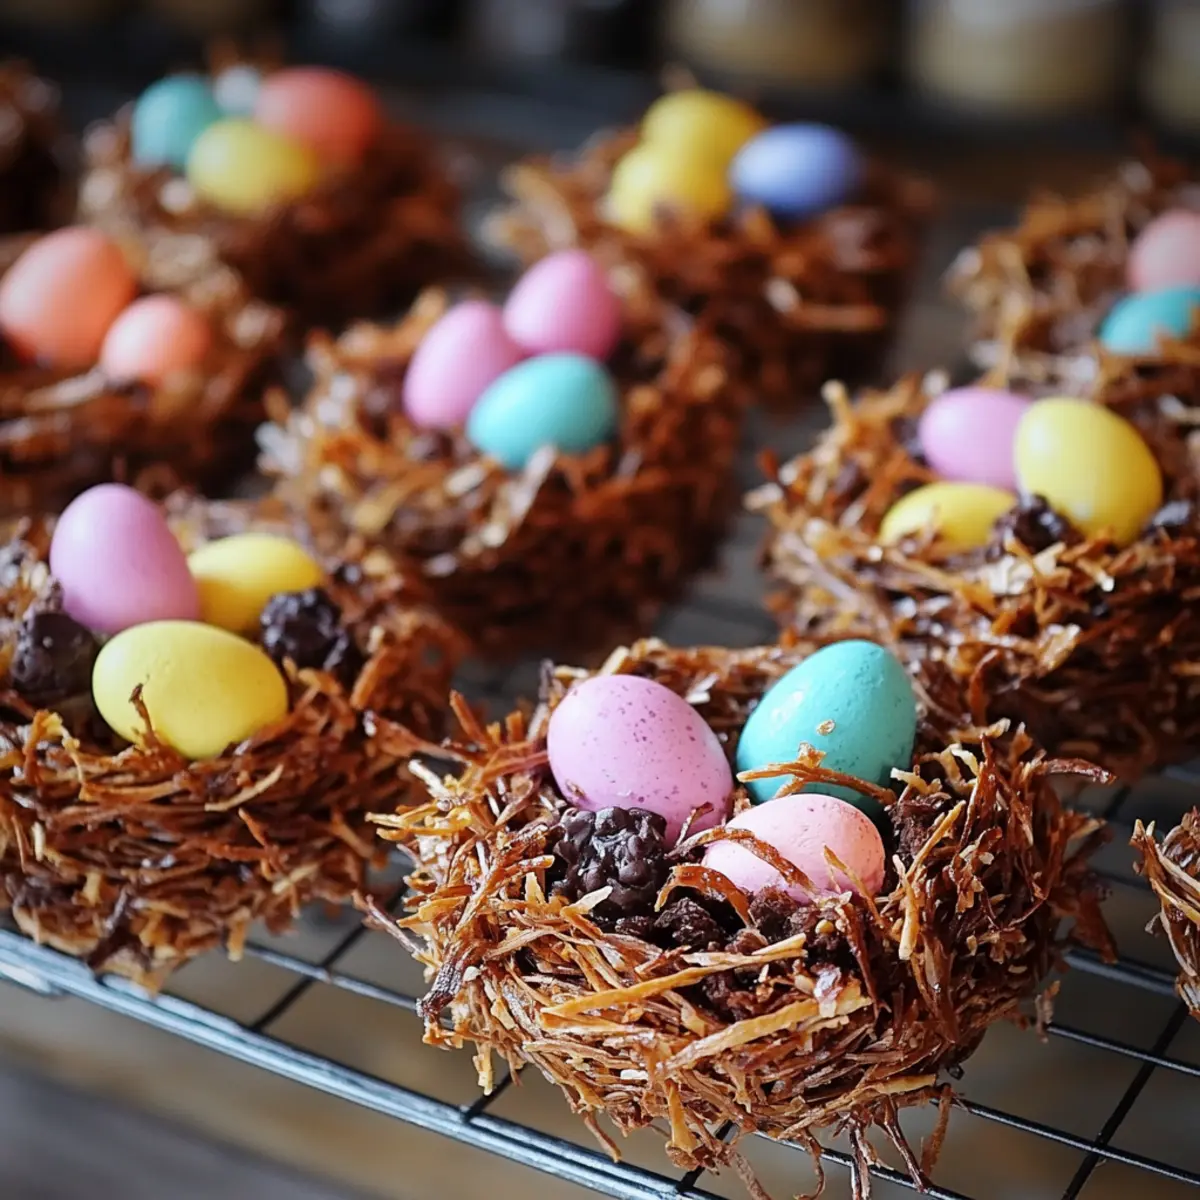
Step 3: Form the Nests
Grab a baking sheet lined with parchment paper. Using a spoon, scoop the chocolate-coated cereal mixture onto the parchment paper. Shape them into small nests, making sure to create an indentation in the center for the candy eggs. Don’t worry about making them perfect—these nests have their own charm!
Step 4: Chill to Set
Pop the baking sheet into the refrigerator and let the nests set for about 30 minutes. This is a great time to sip on a cup of tea or snack on some leftover chocolate chips (you can’t let them go to waste)!
Step 5: Fill with Joy
Once the nests are set and firm to the touch, take them out of the refrigerator. Carefully fill each nest with your colorful candy eggs, nestling them in that chocolatey goodness. It’s like planting little surprises in your garden of treats.
Step 6: Serve and Enjoy
Arrange your beautiful Easter Nests on a platter. You might want to take a few glam shots for Instagram before you dive in! These delightful treats are perfect for sharing (or not—no judgment here if you want them all to yourself).
Now that you have your Easter Nests ready to go, prepare for the oohs and aahs from friends and family. These little bites of happiness ensure that your celebration will have a sweet finish. The combination of crunchy, sweet, and a hint of tropical makes these nests hard to resist.
So whether you’re hosting an Easter brunch, celebrating a spring fling, or simply indulging in some sweet nostalgia, these Easter Nests are sure to elevate your festivities. Enjoy your chocolatey treats and remember—life is too short to not celebrate with a little sweetness!

This showstopping Easter Nests delivers restaurant-quality results using simple ingredients you probably already have at home. The perfect balance of textures and flavors creates an unforgettable dining experience that will have everyone asking for seconds. Picture-perfect presentation with vibrant colors makes this dish absolutely Instagram-worthy and guaranteed to impress any dinner guest. Incredibly versatile recipe that works beautifully for weeknight dinners, meal prep, special occasions, or even outdoor entertaining sessions.
Perfecting Easter Nests Cooking Process
Start by melting the chocolate chips first while you prep the other ingredients. Once smooth, mix in the shredded wheat until well coated. Then it’s time to shape the nests on parchment paper, ensuring room for those delightful candy eggs.
Add Your Touch to Easter Nests
Feel free to mix up the types of candy eggs according to what tickles your taste buds. Swap the coconut flakes with chopped nuts or add a dash of sea salt to enhance the chocolate flavor. Personalize them for your holiday celebrations!
Storing & Reheating Easter Nests
Store your Easter Nests in an airtight container in the fridge for up to a week. If you want to enjoy them chilled, just take them out before serving. Avoid reheating; they taste best at room temperature.
Chef's Helpful Tips for Easter Nests
- This professional-quality Easter Nests relies on precise timing and temperature control to achieve restaurant-standard results consistently.
- Master the art of mise en place by prepping all ingredients beforehand, ensuring smooth execution and preventing any last-minute cooking disasters.
- The secret lies in layering flavors throughout the cooking process rather than seasoning only at the end for maximum depth.
- Pro tip: let the finished dish rest for optimal texture and flavor development before serving to hungry guests waiting eagerly.
I still remember the first time I made these Easter Nests. My kids squealed with joy, diving into the chocolatey goodness and trying to claim the most colorful eggs. Moments like these are what make cooking so rewarding.
FAQs About Easter Nests
What are Easter Nests?
Easter Nests are delightful and fun treats made primarily from melted chocolate, shredded wheat cereal, and toasted coconut flakes. These bite-sized creations are formed into small nests with an indentation to hold colorful candy eggs, such as jelly beans or chocolate eggs. They are a popular craft for Easter celebrations and a hit with kids and adults alike, offering a perfect balance of textures and flavors in every bite. Whether serving them at family gatherings or as a festive activity, Easter Nests are as enjoyable to make as they are to eat.
How do you make Easter Nests?
Making Easter Nests is quite simple and enjoyable. Begin by melting semisweet chocolate chips in a microwave-safe bowl. Once melted, mix in the shredded wheat cereal until every piece is well coated. Next, spoon the mixture onto parchment paper, shaping them into small nests with a hollow for candy eggs. Refrigerate to set for about 30 minutes, and finally, fill each nest with colorful candy eggs. This no-bake recipe is perfect for bringing the family together during the holiday.
What variations can I try for Easter Nests?
There are numerous exciting variations to explore with Easter Nests! You can experiment by using different types of chocolate such as milk, dark, or even white chocolate. Additionally, consider substituting the toasted coconut with chopped nuts, dried fruits, or even sprinkles for an extra festive look. You could also explore different candies for filling, like mini marshmallows or fruity gummies. This versatility allows you to customize the nests based on your preferences or the ingredients you have on hand.
How should I store Easter Nests?
To store Easter Nests, place them in an airtight container in the refrigerator, where they can stay fresh for up to a week. If you prefer serving them chilled, remove them from the fridge shortly before you’re ready to enjoy. It’s best to avoid reheating the nests since they taste best at room temperature. Just make sure they are well-protected to avoid absorbing any odors from your fridge.
Conclusion for Easter Nests
Easter Nests are a charming and delicious way to celebrate the holiday, combining melted chocolate and crunchy cereals in a fun, festive shape. With simple ingredients and quick preparation, these treats are perfect for family gatherings or festive activities. The versatile nature of Easter Nests allows for endless customization, making them a favorite among kids and adults alike. So, gather your loved ones and indulge in these colorful, joyful delights this Easter season!

Easter Nests
Ingredients
Equipment
Method
- Melt the chocolate chips in a microwave-safe bowl, heating in 30-second increments until smooth.
- Mix the shredded wheat cereal into the melted chocolate until well coated.
- Spoon the mixture onto parchment paper, forming small nests with an indentation for candy.
- Refrigerate for 30 minutes to set.
- Fill each nest with colorful candy eggs and serve on a platter.