
Creamy Roasted Garlic Butternut Squash Soup (30 Mins)
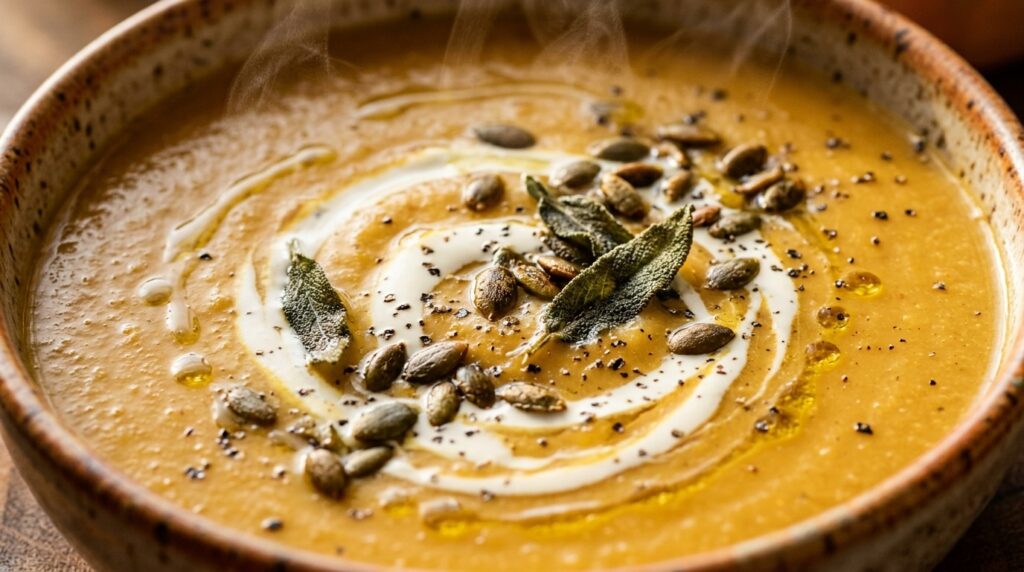
As autumn leaves turn amber and evening temperatures begin to drop, there is nothing quite as soul-warming as a steaming bowl of creamy roasted garlic butternut squash soup. The natural sweetness of tender roasted squash paired with caramelized roasted garlic, fragrant thyme, and a gentle swirl of fresh cream creates a luxurious, velvety bowl of pure comfort. Ready in just 30 minutes, this vibrant golden soup turns any chilly weeknight into an intimate culinary retreat. The secret to achieving an intensely deep, restaurant-level flavor profile lies in high-heat roasting rather than simple boiling. Roasting the cubed squash and a whole head of garlic at 400°F coaxes out natural sugars through Maillard caramelization, converting sharp allium bite into mellow, sweet garlic butter. When pureed with rich broth and finished with a pinch of freshly ground nutmeg, the soup achieves a naturally thick, spoon-coating texture that requires zero flour or artificial thickeners. Why You’ll Love This Recipe 30-Minute Seamless Prep: Roasting the vegetables while preparing your broth keeps kitchen time minimal and hands-off. Effortless One-Sheet Cleanup: The main roasting happens on a single parchment-lined sheet pan before a quick pot simmer and blend. 100% Halal Wholesome & Nutritious: Naturally vegetarian, packed with Vitamin A, fiber, and wholesome antioxidants—strictly zero pork and zero alcohol. Silky Luxurious Mouthfeel: Pureeing roasted squash creates a mirror-smooth texture that feels deeply decadent yet remains light and wholesome. Key Ingredients & Smart Swaps Fresh Butternut Squash: Opt for a heavy squash with smooth, unblemished matte skin. Pre-cubed squash from the produce aisle is an exceptional time-saver that shaves 10 minutes off prep. Whole Head of Garlic: Roasting whole garlic inside foil steams the cloves in their own natural oils, creating a spreadable, sweet paste with zero harsh bitterness. Sweet Carrots & Yellow Onion: Build an aromatic mirepoix backbone that enhances the golden hue and balances the squash’s natural earthiness. Rich Vegetable or Bone Broth: Provides savory depth. Use rich low-sodium vegetable broth for a vegetarian dish, or bone broth for an extra protein boost. Heavy Cream & Pure Maple Syrup: Heavy cream rounds out the finish with velvety silkiness, while a single tablespoon of maple syrup amplifies the caramelized fall flavors. Smart Swap: Use full-fat culinary coconut milk for a 100% dairy-free vegan version. Gourmet Pairings: Looking to make it a hearty two-course dinner? Pair a warm cup of this soup with our viral Creamy Garlic Parmesan Beef Meatballs for an unforgettable evening feast. Step-by-Step Cooking Walkthrough 1. Sheet Pan Roasting: Toss your cubed butternut squash, onion, and carrots with olive oil, sea salt, pepper, and herbs on your baking sheet. Place the foil-wrapped whole garlic head alongside and roast at 400°F (200°C) for 25 minutes until caramelized and fork-tender. 2. Combine in Pot: Transfer the tender roasted vegetables into a Dutch oven. Squeeze the sweet roasted garlic cloves out of their skins directly into the vegetables. Pour in the broth and a pinch of ground nutmeg. 3. Silken Pureeing: Simmer for 5 minutes, then insert an immersion hand blender and blend continuously on high speed until the soup turns luxurious, glossy, and cloud-smooth. 4. Cream Finish & Garnish: Turn heat to low, stir in the heavy cream and maple syrup, and let warm gently for 2 minutes. Ladle into wide ceramic bowls and top with crispy garlic croutons and toasted pepitas. 3 Chef Secrets for Perfect Results 1. Roast, Never Boil: Boiling squash in water waterlogs the flesh and washes away delicate flavors. High-heat roasting concentrates the moisture and triggers caramelization that gives the soup its iconic golden sweetness. 2. The Fresh Nutmeg Magic: A tiny pinch of ground nutmeg elevates butternut squash from ordinary pureed vegetable to a warm, gourmet bistro masterpiece. It harmonizes the cream and earthy squash beautifully. 3. Texture Contrast Garnish: Because this soup is ultra-silky, adding a crunchy textural contrast—such as crunchy herb croutons, roasted pumpkin seeds, or pomegranate arils—makes every spoonful exciting and visually striking. What to Serve With Creamy Butternut Squash Soup Warm Artisan Breads: Crusty sourdough boules, warm garlic herb focaccia, or toasted brioche fingers for dipping into the velvety broth. Crisp Table Salads: A refreshing acidic side like our reader-favorite Crunchy Homemade Coleslaw Salad or a peppery arugula salad with lemon vinaigrette. Hearty Mains: Serve as an elegant holiday appetizer before enjoying our savory Lemon Garlic Chicken and Potatoes. Chilled Beverages: Freshly pressed spiced apple cider or sparkling mineral water with fresh rosemary and lime wedges. Storage, Freezing & Reheating Instructions Refrigerator Storage: Allow soup to cool completely before transferring to airtight glass mason jars or containers. Stores beautifully in the fridge for up to 5 days. Gentle Reheating: Warm over medium-low heat on the stovetop, whisking occasionally. Add a splash of broth or water if the soup has thickened during chilling. Freezer-Friendly Meal Prep: This soup freezes wonderfully for up to 3 months! If freezing, leave out the heavy cream until reheating on serving night for the freshest texture. Frequently Asked Questions Can I make this soup completely vegan and dairy-free?Yes! Simply replace the heavy cream with full-fat canned coconut milk or soaked blended raw cashews. The soup remains ultra-creamy without altering the rich roasted flavor. What if I do not own an immersion hand blender?You can easily use a countertop blender. Allow the roasted vegetables and broth to cool slightly, then blend in two small batches with the lid’s center cap slightly ajar (covered with a kitchen towel) to allow steam to escape safely. How do I pick the sweetest butternut squash at the grocery store?Look for a squash that feels surprisingly heavy for its size with a thick neck (which contains solid flesh with fewer seeds). A matte, pale beige exterior indicates peak ripeness and sweetness, whereas shiny skin means it was picked too early. Pin This Recipe for Later Planning your cozy fall dinners or Thanksgiving menu? Save this pin to your favorite Pinterest soup board so you always have this 30-minute crowd-pleaser on hand!
Creamy Garlic Parmesan Beef Meatballs (25-Minute Skillet)

There is something deeply comforting about the irresistible aroma of sizzling beef and caramelized garlic filling your kitchen after a long, demanding day. These succulent, golden-brown seared beef meatballs swimming in a rich, velvety garlic parmesan cream sauce deliver restaurant-grade decadence in just 25 minutes. Every bite strikes the ultimate balance of savory depth, tender texture, and creamy richness that will have everyone scraping their bowls clean. What elevates this one-pan skillet from an ordinary weeknight dinner to a culinary masterpiece is the fond caramelization left behind by the seared meatballs. As the beef browns over high heat, it leaves concentrated flavor bits on the skillet bottom that dissolve effortlessly into melted butter, rich beef bone broth, and freshly grated Parmigiano-Reggiano. The result is a glossy, full-bodied sauce that clings luxuriantly to every meatball without needing canned soups or artificial thickeners. Why You’ll Love This Recipe Lightning-Fast Weeknight Speed: Ready in just 25 minutes from prep bowl to dining table, making it your ultimate lifesaver for busy weeknight schedules. Effortless One-Skillet Cleanup: Everything cooks right in a single cast-iron or deep stainless steel skillet, keeping post-dinner kitchen cleanup to an absolute minimum. 100% Halal Wholesome Comfort: Crafted with lean ground beef, pure beef bone broth, and fresh dairy—strictly zero pork, zero alcohol deglazing, and naturally low in carbs. Restaurant-Grade Culinary Profile: Tender, melt-in-your-mouth meatballs bathed in a silken, garlicky cheese reduction that rival high-end Italian bistro fare. Key Ingredients & Smart Swaps Lean Ground Beef (85/15): Provides the perfect balance of juicy tenderness and structure without releasing excess grease. Smart Swap: Halal ground lamb or ground turkey thighs also work magnificently. Panko Breadcrumbs & Egg: Acts as a tenderizing binder that traps natural juices inside the meatballs. Smart Swap: Use crushed pork rinds or almond flour for a strict keto/gluten-free version. Fresh Parmigiano-Reggiano: Always grate your own cheese from a block for optimal melting and salty umami depth. Pre-shredded tub cheese contains anti-caking starches that cause sauces to clump. Fresh Garlic (8 Cloves Total): Split between the meatball seasoning and the cream reduction to deliver layered garlic warmth without harsh bite. Rich Beef Bone Broth: Used to deglaze the skillet pan drippings, infusing deep savory foundation before the cream is introduced. Heavy Whipping Cream: Creates a silky, luxurious emulsion that thickens naturally when simmered with the melted cheese. Step-by-Step Cooking Walkthrough 1. Gentle Mixing & Shaping: In a wide mixing bowl, combine the ground beef, breadcrumbs, grated parmesan, beaten egg, minced garlic, parsley, salt, and pepper. Mix gently with your fingertips just until combined. Scoop and roll into 16 uniform 1.5-inch spheres. 2. Golden Pan Sear: Heat olive oil in your heavy skillet over medium-high heat until shimmering. Sear the meatballs in a single uncrowded layer for 5 to 7 minutes, turning with tongs until beautifully crusted and cooked through. Transfer to a resting plate. 3. Build the Garlic Fond Reduction: Lower the skillet heat to medium and melt the butter. Add the sliced garlic and sauté for 60 seconds until fragrant. Pour in the beef bone broth, using a wooden spatula to vigorously scrape up the browned fond from the bottom of the pan. 4. Velvet Cream & Parmesan Emulsion: Pour in the heavy cream and simmer gently for 3 minutes. Turn heat to low, then slowly whisk in the freshly grated parmesan cheese until the sauce becomes mirror-glossy and rich. 5. Simmer & Glaze: Return the meatballs and their resting plate juices into the skillet. Spoon the bubbling garlic sauce over the top, simmer for 2 minutes to heat through, and garnish generously with fresh Italian parsley and shaved parmesan ribbons. 3 Chef Secrets for Perfect Results 1. The “Light Touch” Rolling Secret: Never compact or squeeze meatball mixture tightly. Overworking ground beef forces out moisture and creates dense, rubbery meatballs. Mix lightly with fingertips and roll with gentle pressure for ultra-tender results that melt in your mouth. 2. Never Discard the Pan Fond: The deep golden-brown coating left on the skillet bottom after searing the meatballs is culinary gold. Deglazing immediately with beef bone broth while the pan is hot releases that concentrated savory flavor right into your cream base. 3. Low Heat Cheese Whisking: Always lower your stovetop flame to low before whisking in the grated Parmigiano-Reggiano. High boiling heat can cause dairy proteins to separate and curdle, while gentle heat yields a silky, restaurant-grade emulsion. What to Serve With Creamy Garlic Parmesan Meatballs Carb Foundations: Wide buttered egg noodles, creamy roasted garlic mashed potatoes, or steamed basmati rice to soak up every drop of velvety garlic sauce. Artisan Breads: Warm crusty sourdough baguette or garlic herb focaccia for wiping the skillet clean. Fresh Green Contrasts: A crisp baby arugula salad tossed with lemon juice, extra virgin olive oil, and shaved radishes provides a refreshing acidic contrast to the rich cream sauce. Table Beverage: San Pellegrino sparkling mineral water with fresh lemon slices or an iced unsweetened herbal berry iced tea. Storage, Freezing & Reheating Instructions Refrigerator Storage: Let the meatballs cool completely, then store in an airtight glass container in the fridge for up to 4 days. The sauce will naturally thicken upon chilling. Gentle Reheating: Reheat gently in a small skillet over low heat with 2 to 3 tablespoons of extra broth or milk, stirring occasionally until warmed through. Avoid high microwave heat to keep the cream sauce from breaking. Freezer Guidelines: Meatballs can be frozen after searing (without the sauce) in a zip-top freezer bag for up to 3 months. Thaw overnight in the refrigerator, then prepare the fresh 5-minute cream sauce on cooking night! Frequently Asked Questions Can I use ground turkey or chicken instead of beef?Yes! Ground turkey thighs or ground chicken work wonderfully. Because poultry is leaner, add 1 tablespoon of olive oil to the meat mixture to ensure the meatballs remain tender and juicy while searing. How do I prevent the garlic cream sauce from curdling?Two simple rules: use full-fat heavy whipping cream (low-fat milk curdles easily under
Imagine sinking your fork into a perfectly seared miso glazed salmon, the luscious glaze glistening under the warm light, releasing an irresistible aroma that dances through the air. Each bite bursts with a savory umami flavor, complemented by a hint of sweetness, while the tender fish melts in your mouth like a warm hug on a chilly evening, making it the ideal choice for both quick weeknight dinners and special occasions. This dish holds a special place in my heart, often reminding me of family gatherings where laughter and good food intertwined effortlessly. As I whip up this delightful recipe, I can’t help but feel the excitement build—anticipating that first glorious bite that promises not just nourishment but also a moment of pure joy and connection. Why Is miso glazed salmon So Irresistibly Good? Quick and easy to prepare, this dish takes just 25 minutes from prep to plate! Savory sweetness from the white miso paste and honey creates a flavor profile that dances on your palate. Healthy choice, packed with omega-3 fatty acids, making it perfect for weeknight dinners or special occasions. Versatile dish, easily paired with rice, veggies, or salads, appealing to diverse tastes. Crowd-pleaser, guaranteed to impress family and friends with its vibrant presentation and rich taste. miso glazed salmon Ingredients For the Miso Glaze 3 tablespoons white miso paste – This adds a rich umami flavor that beautifully complements the salmon. 2 tablespoons honey – Sweetens the glaze and balances the savory elements for a delightful taste. 1 tablespoon soy sauce (low sodium preferred) – Provides a savory depth while keeping sodium levels in check. 1 teaspoon rice vinegar – Adds a hint of acidity that brightens the overall flavor profile. 1 teaspoon sesame oil – Infuses a nutty aroma that enhances the dish’s complexity. For the Salmon 4 fillets salmon (skin-on or skinless) – Choose your preference for texture; both options are delicious! 1 teaspoon salt (for seasoning) – Enhances the natural flavors of the salmon without overpowering it. 1 teaspoon black pepper (for seasoning) – Adds a subtle heat that elevates the taste experience. For Garnish 2 tablespoons scallions (chopped) – Freshness and color boost, adding a lovely crunch to each bite. 1 tablespoon sesame seeds (toasted) – Provides an extra layer of flavor and a delightful crunch on top of your miso glazed salmon. Step-by-Step miso glazed salmon 1. Whisk together: In a mixing bowl, whisk together 3 tablespoons of white miso paste, 2 tablespoons of honey, 1 tablespoon of low sodium soy sauce, 1 teaspoon of rice vinegar, and 1 teaspoon of sesame oil until smooth and creamy. 2. Preheat oven: Preheat your oven to 400°F (200°C) and line a baking sheet with parchment paper for easy cleanup. 3. Season salmon: Take your 4 salmon fillets and season them generously with 1 teaspoon of salt and 1 teaspoon of black pepper on both sides for that perfect flavor boost. 4. Place salmon: Arrange the seasoned salmon fillets on the prepared baking sheet, ensuring they are skin side down to keep them moist during baking. 5. Brush glaze: Generously brush the miso glaze over the top of each salmon fillet, allowing the flavors to seep in as they cook. 6. Bake salmon: Place the baking sheet in the preheated oven and bake for 10-12 minutes, or until the salmon is cooked through and flakes easily with a fork—watch for that beautiful golden hue! 7. Garnish and serve: Remove from the oven and let rest for a couple of minutes. Garnish with 2 tablespoons of chopped scallions and 1 tablespoon of toasted sesame seeds before serving for an added crunch. Optional: Top with fresh lime juice for an extra zing! Exact quantities are listed in the recipe card below. Pro Tips for miso glazed salmon Miso Selection: Use white miso for a milder, sweeter flavor that complements the salmon without overpowering it. Honey Consistency: If your honey is too thick, warm it slightly to make it easier to mix into the glaze for a smoother texture. Salmon Skin: Bake skin-on fillets for extra moisture; if using skinless, consider adding a splash of oil to prevent drying out. Glaze Generosity: Don’t skimp on the miso glaze! A generous layer enhances flavor and keeps the salmon moist during baking. Resting Time: Allow the baked salmon to rest briefly before garnishing; this helps retain juices for a more succulent bite. Garnish Freshness: Always use freshly chopped scallions and toasted sesame seeds for maximum flavor and visual appeal in your miso glazed salmon. How to Store and Freeze miso glazed salmon Fridge: Store any leftover miso glazed salmon in an airtight container for up to 3 days to maintain freshness and flavor. Freezer: If you need to freeze, wrap the salmon tightly in plastic wrap, then place it in a freezer-safe bag for up to 2 months. Reheating: When ready to enjoy, thaw the salmon overnight in the fridge and reheat gently in the oven at 350°F (175°C) for about 10 minutes. Miso Glaze Storage: The glaze can be stored in the fridge for up to a week in a sealed jar—perfect for quick weeknight meals! miso glazed salmon Your Way Feel free to get creative and personalize this dish to suit your taste buds and dietary needs! Spicy Kick: Add 1 teaspoon of sriracha or chili paste to the miso glaze for a delightful heat. This twist not only spices things up but also adds an exciting depth of flavor that will awaken your palate. Maple Miso: Swap honey with maple syrup for a vegan-friendly option. The rich, earthy notes of maple syrup complement the savory miso beautifully, creating a unique glaze that’s sure to impress. Citrus Zest: Incorporate the zest of one lime or lemon into the glaze for a refreshing twist. This brightens the sauce, adding a zesty freshness that balances the umami flavors perfectly. Ginger Infusion: Mix in 1 tablespoon of freshly grated ginger for an aromatic kick. Ginger pairs wonderfully with salmon,
Delicious Dirty Soda Recipe: A Refreshing 5-Minute Treat
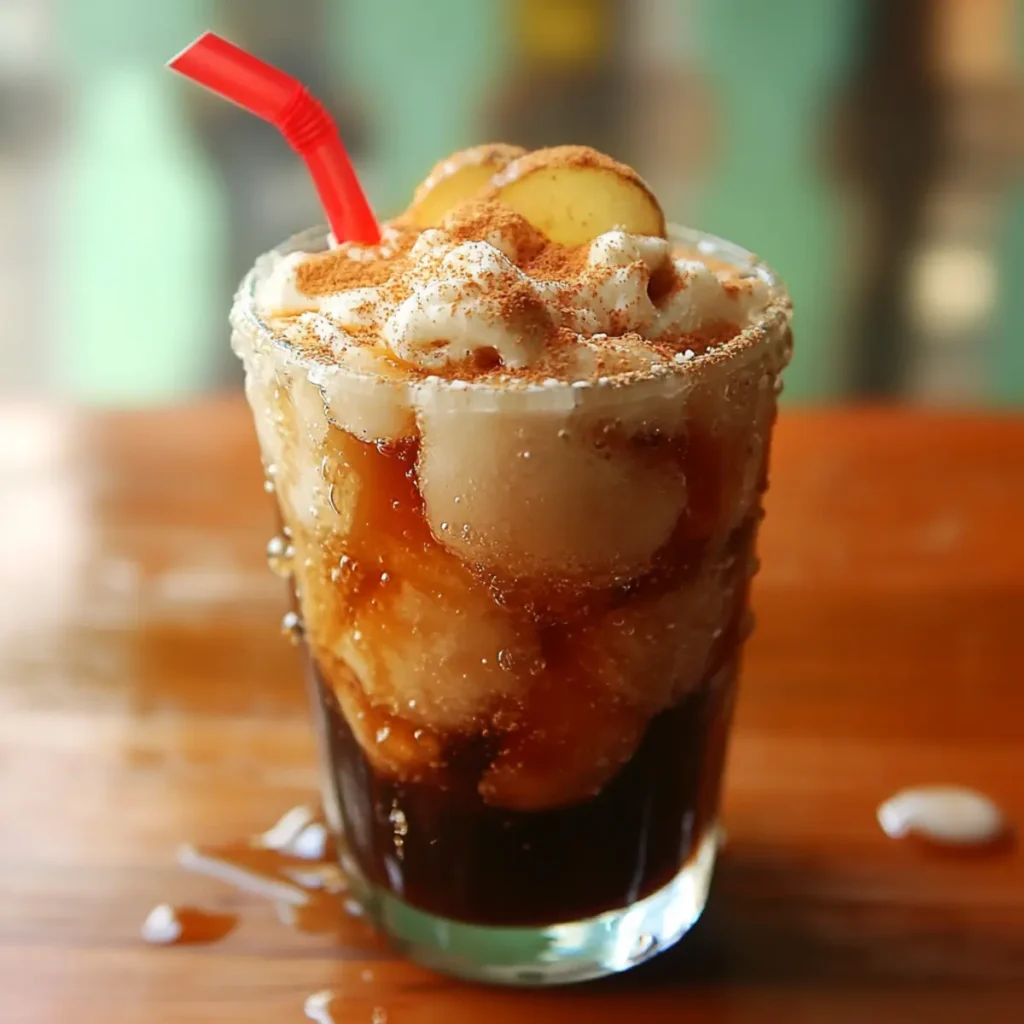
The idea of sipping on a refreshing Dirty Soda feels like an elaborate escape into a world of fizzy cheeriness and creamy sweetness. Imagine the delightful fizz tickling your senses as you enjoy a drink that combines the charm of bubbly joy with creamy indulgence, a perfect antidote to mundane days. This Dirty Soda is not just a thirst-quencher; it’s like sunshine in a glass, turning even the dullest afternoon into a celebration. Picture this: you’ve just returned home after a long day, and as you plop down on the couch, someone hands you a frosty glass of this vibrant concoction. Instantly, everything feels better. It’s a delightful companion for a movie night, a BBQ, or even just lounging on a weekend. So, let’s dive right into this snazzy recipe, and I promise, you’ll be sipping bliss in no time. Ingredients for Dirty Soda Here’s what you’ll need to make this delicious Dirty Soda: 4 cups club soda – Look for a good quality, carbonated beverage to ensure the fizz factor is off the charts. 1 cup cream (or half-and-half) – For a richer flavor, cream is ideal, but half-and-half works perfectly for a lighter option. 1/2 cup flavored syrup – Choose your favorite flavor such as vanilla, cherry, or coconut to really express your personality in this drink. 4 slices lime – A zesty garnish that adds brightness and a refreshing twist. 4 sprigs mint – Not just for show! Mint adds an aromatic touch that elevates the entire drinking experience. How to Make Dirty Soda Follow these simple steps to prepare this delicious Dirty Soda: Step 1: Gather Your Ingredients Start by putting all your ingredients on the counter. You’ll need club soda, cream, flavored syrup, lime slices, and mint. The anticipation begins! Step 2: Mix the Base In a large pitcher, combine 4 cups of club soda, 1 cup of cream, and 1/2 cup of your chosen flavored syrup. Stir gently to blend everything without losing that tantalizing fizz. Remember, you’re aiming for balance! Step 3: Chill It Down Prepare your glasses with ice. The colder, the better. This is where your Dirty Soda will really shine, providing that refreshing chill each sip promises. Step 4: Pour and Present Carefully pour the creamy cola mixture over the ice. Watch as the colors swirl together, creating a fizzy masterpiece ready to impress. Step 5: Add the Garnishes Top each glass with a slice of lime and a sprig of mint. This not only looks stunning but enhances the aroma with every sip you take. Step 6: Sip and Savor Now comes the best part – take a moment to admire your creation before diving in. As you sip, enjoy the playful blend of flavors and textures. It’s a party in a glass! This delectable Dirty Soda isn’t just quick to whip up; it’s versatile and easily customizable. For those hot summer days or fun BBQ evenings, it serves as a delightful treat that will keep everyone smiling. Additionally, your friends will be asking for the recipe, bringing a sense of joy to whoever gets to enjoy this fun drink. So, next time you feel like treating yourself (or your guests) to something indulgently refreshing, remember this Dirty Soda recipe. It’s not just a drink; it’s an experience worth savoring! Cheers to bubbling happiness and sweet moments shared! This showstopping Dirty Soda delivers restaurant-quality results using simple ingredients you probably already have at home. The perfect balance of textures and flavors creates an unforgettable dining experience that will have everyone asking for seconds. Picture-perfect presentation with vibrant colors makes this dish absolutely Instagram-worthy and guaranteed to impress any dinner guest. Incredibly versatile recipe that works beautifully for weeknight dinners, meal prep, special occasions, or even outdoor entertaining sessions. Perfecting Dirty Soda Cooking Process The cooking process for Dirty Soda is straightforward. Start by gathering your ingredients for easy access. Combine the club soda, cream, and flavored syrup in a pitcher, mix gently, and serve over ice for a refreshing treat in minutes. Add Your Touch to Dirty Soda Feel free to customize your Dirty Soda by experimenting with different flavored syrups like mango or raspberry. You can also swap out cream for coconut milk for a dairy-free version or add fresh fruit for an extra burst of flavor. Storing & Reheating Dirty Soda To store leftover Dirty Soda, cover the pitcher and refrigerate. For best results, consume within 24 hours as carbonation may fade. Avoid reheating; instead, serve chilled for freshness. There was a memorable summer evening when I served Dirty Soda at a family gathering. My cousin, who usually hates sweet drinks, couldn’t resist coming back for seconds, claiming it was “the best thing ever!” Moments like that are why I love crafting fun recipes. FAQs About Dirty Soda What is Dirty Soda? Dirty Soda is a delightful, fizzy beverage that combines club soda with a splash of cream and flavored syrup, creating a sweet and creamy concoction. This drink takes just minutes to prepare and is perfect for summertime gatherings or when you’re craving something refreshing. With various flavored syrups available, you can customize it to your taste, making it a versatile treat suited for any occasion. The addition of lime and mint garnishes enhances its lively presentation, making it not just delicious but visually appealing as well. How do I customize my Dirty Soda? You can easily personalize your Dirty Soda by experimenting with different flavored syrups. Try using mango or raspberry instead of the more common vanilla and cherry for a tropical twist. Additionally, consider swapping out the cream for coconut milk to make a dairy-free version. For an extra flavor burst, toss in some fresh fruit slices, like strawberries or blueberries. Each variation offers a unique twist, ensuring your drink is delightful with every sip. What occasions are best for serving Dirty Soda? Dirty Soda is the perfect drink for any occasion, from casual family gatherings to festive parties. Its quick preparation makes
Delicious Balsamic Spinach and Mushrooms Recipe in 20 Minutes
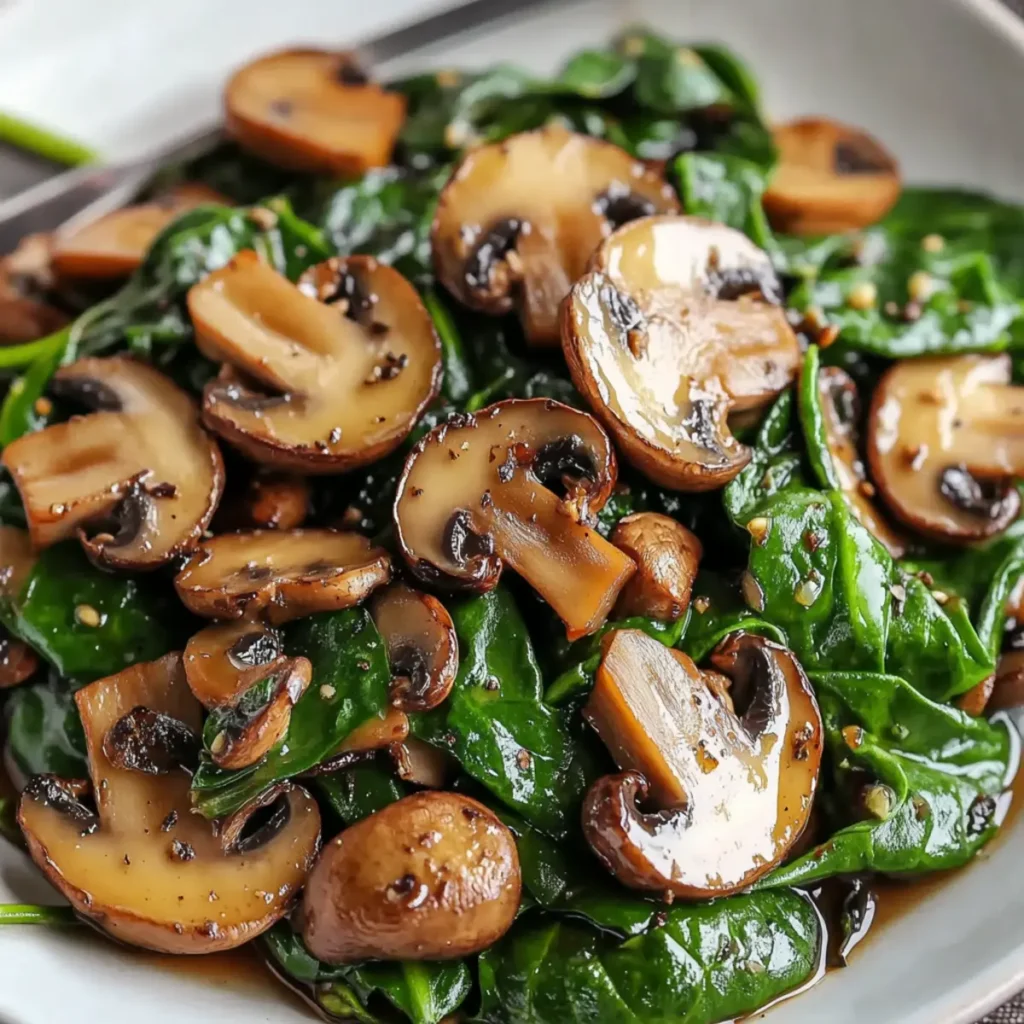
The captivating aroma of sautéed garlic and earthy mushrooms creates an instant irresistible allure, promising a heavenly flavor explosion in every bite of Balsamic Spinach and Mushrooms. Imagine the vibrant green of fresh spinach shimmering next to the glossy brown of mushrooms, all bathed in a tangy balsamic vinegar sauce that brings your taste buds to life. Remember the first time you stepped into a cozy bistro and got hit by a wave of delicious aromas? This is the dish that replicates that moment right in your kitchen! Whether it’s a casual weeknight dinner or a gathering with friends, these Balsamic Spinach and Mushrooms are the perfect accompaniment to any meal. So grab your apron, and let’s whip up some culinary magic together! Ingredients for Balsamic Spinach and Mushrooms Here’s what you’ll need to make this delicious Balsamic Spinach and Mushrooms: 8 cups fresh spinach – Opt for bright green leaves, as a fresh bunch adds vibrant color and nutrients to the dish. 8 ounces mushrooms – Choose cremini or button mushrooms for earthy flavor; ensure they are firm and free of blemishes for the best results. 2 tablespoons olive oil – A good quality olive oil adds richness; you can also use avocado oil for a different flavor profile. 1 clove garlic – Freshly minced garlic infuses the dish with a savory aroma and flavor; the more fragrant, the better. 2 tablespoons balsamic vinegar – Use a high-quality balsamic for that sweet and tangy kick that perfectly balances the flavors. 1 tablespoon honey – Adds a touch of sweetness to contrast with the acidity of balsamic vinegar; feel free to substitute with maple syrup for a vegan option. Salt and pepper to taste – Season according to your preference, as a little can go a long way in enhancing flavors. Grated Parmesan cheese – Adds a creamy and salty finish; for those avoiding dairy, nutritional yeast is a great alternative. Chopped walnuts or pine nuts – These add a delightful crunch and nutty flavor, elevating the dish’s texture and appearance. How to Make Balsamic Spinach and Mushrooms Follow these simple steps to prepare this delicious Balsamic Spinach and Mushrooms: Step 1: Heat the Oil Begin by heating the olive oil in a skillet over medium heat until shimmering but not smoking. A non-stick skillet works wonders for easy cleanup. Step 2: Sauté the Garlic Add the minced garlic to the skillet and sauté until fragrant, about 30 seconds. Be careful not to burn it; burnt garlic becomes more bitter than a lover telling you they ‘need space.’ Step 3: Cook the Mushrooms Once the garlic is aromatic, add the sliced mushrooms to the skillet. Stir them around until they soften, about 3-4 minutes. Watch how they release their lovely juices—like a concert for your taste buds! Step 4: Wilt the Spinach Now add the fresh spinach to the pan. You may feel slight panic watching it take over the skillet, but don’t worry; it’ll wilt down in no time! Stir until the spinach is soft and reduced. Step 5: Add the Balsamic and Honey Drizzle in the balsamic vinegar and honey, then mix everything well. Let it simmer for a minute, allowing the flavors to meld together harmoniously. Just imagine a symphony of tastes playing on your palate. Step 6: Season and Serve Season with salt and pepper to taste. Transfer the Balsamic Spinach and Mushrooms to a serving dish and sprinkle with grated Parmesan cheese and chopped nuts. This final touch makes the dish pop and adds that gourmet feel. Expect amazing flavors and satisfied smiles as this delicious Balsamic Spinach and Mushrooms step off your plate and into the hearts of those around you! It’s a quick, elegant addition to any spread—perfect for impressing your guests or just treating yourself to something special after a long day. Enjoy every bite! This showstopping Balsamic Spinach and Mushrooms delivers restaurant-quality results using simple ingredients you probably already have at home. The perfect balance of textures and flavors creates an unforgettable dining experience that will have everyone asking for seconds. Picture-perfect presentation with vibrant colors makes this dish absolutely Instagram-worthy and guaranteed to impress any dinner guest. Incredibly versatile recipe that works beautifully for weeknight dinners, meal prep, special occasions, or even outdoor entertaining sessions. Perfecting Balsamic Spinach and Mushrooms Cooking Process The best way to tackle Balsamic Spinach and Mushrooms efficiently is to heat your skillet first while you prep your ingredients. Start by sautéing the garlic and mushrooms before adding the spinach, ensuring everything is perfectly cooked and bursting with flavor. Add Your Touch to Balsamic Spinach and Mushrooms Feel free to get creative with your Balsamic Spinach and Mushrooms. Swap out the mushrooms for zucchini or bell peppers, or add spices like paprika or crushed red pepper for an extra kick. The possibilities are endless! Storing & Reheating Balsamic Spinach and Mushrooms Store leftover Balsamic Spinach and Mushrooms in an airtight container in the refrigerator for up to three days. Reheat gently in a skillet over low heat to maintain the flavor and avoid overcooking the spinach. Sometimes, I whip up Balsamic Spinach and Mushrooms for get-togethers, and the compliments just keep coming. It’s a simple recipe that turns any gathering into a delightful feast, reminding me why I love cooking for others. FAQs About Balsamic Spinach and Mushrooms What is Balsamic Spinach and Mushrooms? Balsamic Spinach and Mushrooms is a delightful dish that combines fresh spinach and tender mushrooms, all beautifully enhanced by a tangy balsamic vinegar dressing. This quick and easy recipe allows the ingredients to shine, offering a delicious blend of flavors that tantalizes the taste buds. The addition of honey balances the acidity of the balsamic, creating a harmonious flavor profile. Perfect as a side dish or a main course, this dish is sure to become a favorite in your household! How can I customize Balsamic Spinach and Mushrooms? Getting creative with Balsamic Spinach and Mushrooms is part of the fun! You
Crispy Air Fryer Broccoli Recipe Ready in Just 17 Minutes
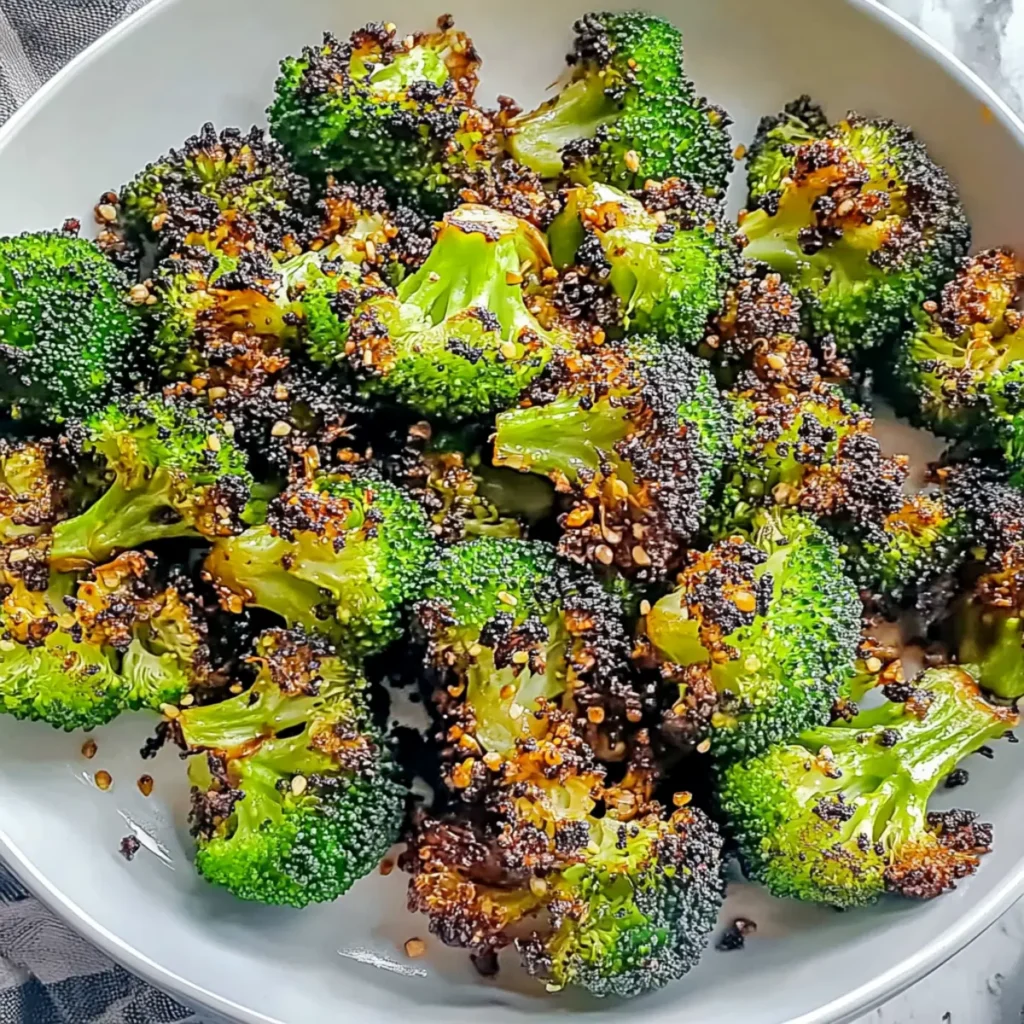
The aroma of crispy air fryer broccoli fills the kitchen, making your mouth water almost immediately. With each bite, you experience a delightful crunch followed by that nutty, roasted flavor we all crave from good vegetable dishes. Whether you’re hosting a dinner party or simply looking for a flavorful side dish, this recipe is sure to impress! It’s family-friendly, healthy, and best of all, quick and easy to prepare. When it comes to compromising on taste while aiming for something nutritious, crispy air fryer broccoli truly shines. Imagine serving a side that not only complements your main dish but also has everyone asking for seconds. The vibrant green florets, lightly seasoned with olive oil and garlic, offer a beautiful plate representation and an explosion of flavor, elevating any meal from ordinary to extraordinary. Ingredients for Crispy Air Fryer Broccoli Here’s what you’ll need to make this delicious Crispy Air Fryer Broccoli: 4 cups broccoli florets – Fresh broccoli is best for vibrant color and a satisfying crunch; feel free to use frozen if that’s all you have. 2 tbsp extra virgin olive oil – This adds healthy fat and flavor; a good quality oil really makes a difference. 1 tsp garlic powder – A fantastic way to infuse savory goodness without the hassle of chopping fresh garlic. ½ tsp salt – Enhances the natural flavors of the broccoli, making it more delicious. ¼ tsp black pepper – Adds a subtle heat that’ll keep your taste buds awake. 2 tbsp grated Parmesan cheese (optional) – Provides a rich, cheesy flavor that complements the broccoli perfectly; feel free to leave it out for a vegan alternative. How to Make Crispy Air Fryer Broccoli Follow these simple steps to prepare this delicious Crispy Air Fryer Broccoli: Step 1: Prepare the Broccoli Rinse and thoroughly dry the broccoli florets. Make sure to get them as dry as possible for that irresistible crispiness in the air fryer. Step 2: Season the Florets In a large bowl, toss the dry florets with olive oil, garlic powder, salt, and pepper until they are evenly coated. This is where the magic begins—watch those little green trees transform! Step 3: Preheat the Air Fryer Set your air fryer to preheat at 400°F (200°C). This step is crucial for achieving that golden-brown exterior that makes crispy air fryer broccoli such a delight. Step 4: Cook the Broccoli Arrange the seasoned broccoli in a single layer in the air fryer basket. Let it work its magic for about 10-12 minutes, shaking the basket halfway through to ensure even cooking and crunchiness. Step 5: Add Parmesan Cheese (Optional) If you like cheesy goodness, sprinkle grated Parmesan cheese over the broccoli during the last few minutes of cooking. This step is optional, but it elevates the flavor to a whole new level. Step 6: Serve and Enjoy Once the cooking time is up, transfer the crispy air fryer broccoli to a serving platter and serve it immediately while it’s warm and perfectly crispy. You can hear the crunch as you dig in! Crispy air fryer broccoli is not just a side dish. It’s an exquisite experience that warms the soul. Imagine pairing these delightful florets with your favorite protein for a complete meal, or serving them as a colorful appetizer at your next gathering. The best part? You won’t have to spend ages in the kitchen to achieve restaurant-like quality. And let’s be honest—healthy eating doesn’t have to be boring. With every bite of crispy air fryer broccoli, you’ll get a satisfying crunch, a punch of flavor, and just the right amount of healthy satisfaction. So grab those broccoli florets and get ready to impress yourself and those lucky enough to share your culinary masterpiece! Perfecting Crispy Air Fryer Broccoli Cooking Process To achieve the ultimate Crispy Air Fryer Broccoli, start by washing and thoroughly drying the florets. Toss them in oil and seasonings before preheating your air fryer and cooking in a single layer for even crispiness. Add Your Touch to Crispy Air Fryer Broccoli Give your Crispy Air Fryer Broccoli personality by adding zest with lemon juice, spice it up with chili flakes, or swap the Parmesan for feta cheese for a different flavor profile. The possibilities are endless! Storing & Reheating Crispy Air Fryer Broccoli Store leftover Crispy Air Fryer Broccoli in an airtight container in the refrigerator for up to three days. To reheat, pop it back in the air fryer for a couple of minutes to regain that delightful crunch. Sharing my Crispy Air Fryer Broccoli experience always brings a smile. My friend Lisa couldn’t get enough of it during our last potluck, declaring it her new favorite way to eat veggies! FAQs About Crispy Air Fryer Broccoli What is Crispy Air Fryer Broccoli? Crispy Air Fryer Broccoli is a delicious and healthy side dish made by cooking broccoli florets in an air fryer until they reach a perfectly crispy texture. The process involves tossing the broccoli with olive oil and seasonings like garlic powder, salt, and pepper, then cooking at a high temperature. This method not only results in a flavorful dish but also retains the nutrients in the broccoli, making it an excellent choice for those looking for nutritious meal options that are quick to prepare. How long does it take to make Crispy Air Fryer Broccoli? Making Crispy Air Fryer Broccoli is a breeze! The total time for preparation and cooking is about 17 minutes. You’ll spend around 5 minutes prepping the broccoli florets and then 12 minutes cooking them in the air fryer. This quick cooking process makes it convenient for busy weeknights while allowing you to enjoy a healthy and crispy vegetable side dish in no time. What are some variations for Crispy Air Fryer Broccoli? There are numerous ways to customize your Crispy Air Fryer Broccoli! You can add a splash of lemon juice for brightness, sprinkle chili flakes for heat, or even swap out Parmesan cheese for feta for a
Super Bowl Easy Sheet Pan Quesadillas Perfect for Game Day Snacks
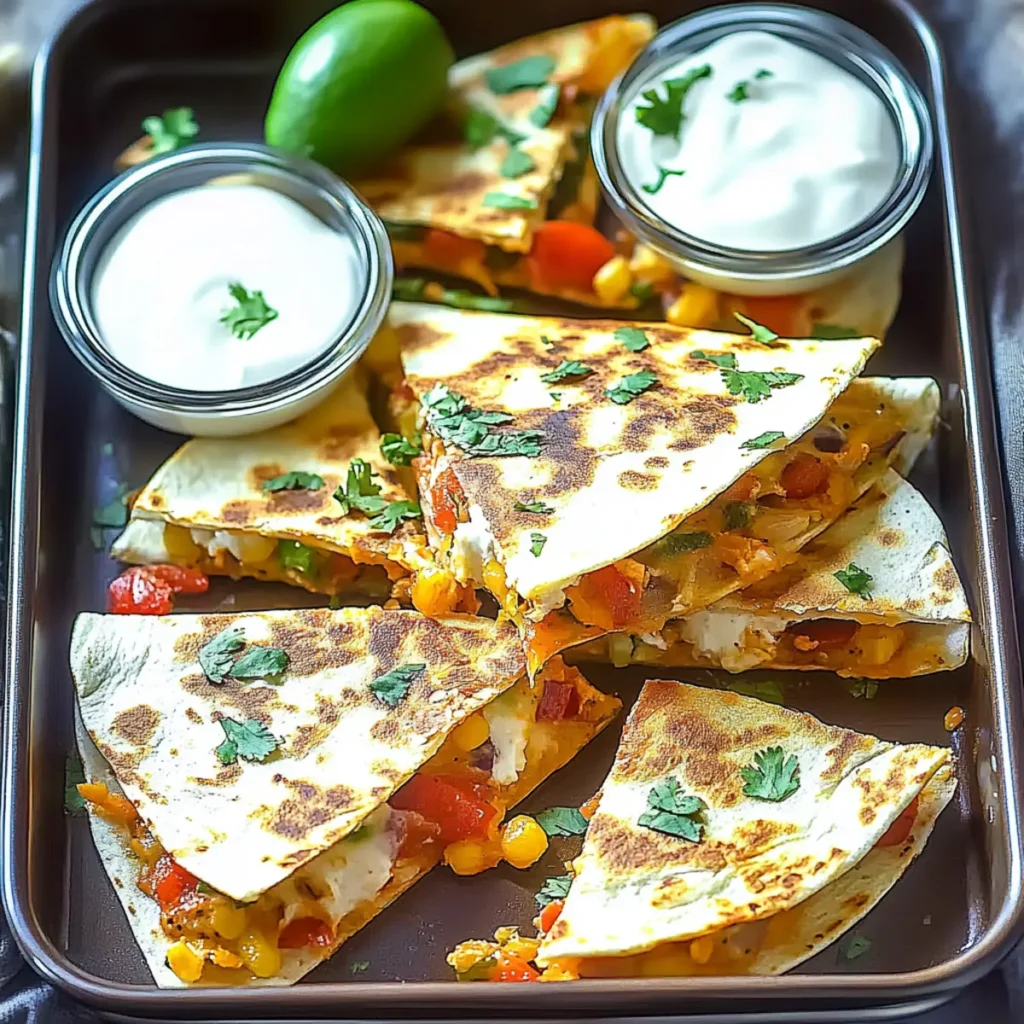
There’s nothing quite like the sizzle of melted cheese and the irresistible aroma of roasted veggies filling the kitchen, especially when you’re prepping for the Super Bowl. Imagine biting into a crispy sheet pan quesadilla, the gooey cheddar cheese stretching and welcoming you to a world of flavor. These SUPER BOWL Easy Sheet Pan Quesadillas are not just a dish; they’re the ultimate game-day snack that will make your friends cheer louder than any touchdown. Perfect for feeding a hungry crowd or savoring solo while binge-watching your favorite series, these quesadillas are as versatile as they are delicious. You’ll want to save this recipe for every occasion—family gatherings, date nights, or simply when you need a cheat day treat to brighten your week. Ingredients for SUPER BOWL Easy Sheet Pan Quesadillas Here’s what you’ll need to make this delicious SUPER BOWL Easy Sheet Pan Quesadillas: 4 large flour tortillas – Tortillas act as the foundation for your quesadillas, offering a soft yet sturdy base that holds all the goodness within. 2 cups shredded cheddar cheese – This cheesy delight is the star of the show, adding melty goodness that binds everything together while delivering that classic quesadilla flavor. 1 cup cooked shredded chicken or black beans – Both options provide a protein punch and add heartiness; choose chicken for a meaty bite or black beans for a deliciously vegan twist. 1 cup sliced bell peppers (mixed colors) – These colorful veggies bring sweetness, crunch, and vibrant appeal to your dish, ensuring every bite is a visual treat. 1/2 cup sliced red onion – Adding tang and texture, red onions enhance the overall flavor profile; feel free to sauté them briefly for a milder taste. 1 tsp ground cumin – This warm spice infuses your quesadillas with a depth of flavor that brings everything together and lifts the spice profile to a new level. 1 tsp chili powder – Give a little kick to your quesadillas with chili powder, adding just the right amount of heat to wake up those taste buds without being overwhelming. How to Make SUPER BOWL Easy Sheet Pan Quesadillas Follow these simple steps to prepare this delicious SUPER BOWL Easy Sheet Pan Quesadillas: Step 1: Preheat the Oven Start by preheating your oven to 400°F (200°C) and lining a large baking sheet with parchment paper for easy cleanup. A non-stick surface keeps everything from getting too clingy. Step 2: Prepare the Filling In a mixing bowl, combine the cooked shredded chicken or black beans, sliced bell peppers, red onion, cumin, and chili powder. Use a spatula to mix until all the veggies and protein are well-coated in the spices. Step 3: Assemble the Quesadillas Lay half of the tortillas flat on the baking sheet. Distribute the filling mixture evenly among them, then sprinkle a generous layer of shredded cheddar cheese on top of each filled tortilla. Step 4: Top and Press Place the remaining tortillas on top of the filled ones and gently press down to help the layers stick together. This step is vital for achieving that crispy texture when baking. Step 5: Bake to Perfection Pop your tray in the oven and bake for about 15-20 minutes or until the tortillas are golden brown and crispy. Keep an eye out so they don’t get overdone; nobody likes a burnt quesadilla. Step 6: Serve and Enjoy Once they’re beautifully crisped, let the quesadillas cool for a couple of minutes before slicing them into wedges. Serve warm with your favorite salsa or guacamole for the perfect finishing touch. As the big game approaches, these SUPER BOWL Easy Sheet Pan Quesadillas will surely steal the spotlight at your snack table! Whether you enjoy them topped with fresh salsa, creamy guacamole, or a drizzle of sour cream, your taste buds are in for an unforgettable experience. So gather the crew, and let the flavor fest begin! Perfecting SUPER BOWL Easy Sheet Pan Quesadillas Cooking Process To create the best SUPER BOWL Easy Sheet Pan Quesadillas, start by preheating your oven and prepping your fillings. Sear any chicken you’re using, sauté the veggies, and only then, assemble and bake for perfect results. Add Your Touch to SUPER BOWL Easy Sheet Pan Quesadillas Feel free to customize your SUPER BOWL Easy Sheet Pan Quesadillas by swapping in your favorite cheeses, adding jalapeños for a kick, or using beans instead of chicken to make it vegetarian-friendly. The possibilities are endless! Storing & Reheating SUPER BOWL Easy Sheet Pan Quesadillas To store leftover SUPER BOWL Easy Sheet Pan Quesadillas, let them cool completely before sealing in an airtight container. Reheat in the oven or a skillet to maintain that crispy texture. When I first whipped up these SUPER BOWL Easy Sheet Pan Quesadillas, my friends couldn’t stop raving about them. I think I earned the unofficial title of “Quesadilla Queen” that night! FAQs About SUPER BOWL Easy Sheet Pan Quesadillas What is SUPER BOWL Easy Sheet Pan Quesadillas? SUPER BOWL Easy Sheet Pan Quesadillas are a delightful twist on traditional quesadillas, designed for easy preparation and maximum flavor. This recipe combines flour tortillas, cheese, and a colorful array of fillings like chicken or black beans, bell peppers, and onions. All of this goodness is baked on a sheet pan in the oven, making cleanup a breeze. Perfect for game day gatherings or casual family dinners, these quesadillas pack a punch without requiring hours in the kitchen. How can I customize my SUPER BOWL Easy Sheet Pan Quesadillas? You can unleash your creativity with SUPER BOWL Easy Sheet Pan Quesadillas by swapping out ingredients and adding your favorites. Consider using different cheeses like pepper jack or gouda for a distinctive twist. Add heat with jalapeños, or make it vegetarian with extra veggies or beans. For those who enjoy gourmet flavors, toss in some cilantro or avocado slices. The beauty of these quesadillas lies in their versatility, allowing you to cater to your tastes or dietary needs. Can I make SUPER BOWL Easy
Delicious SUPER BOWL Winter Sangria Recipe for Your Party

In the cozy comforts of winter, as snowflakes flutter down and the aroma of cinnamon fills the air, there’s something magical about sipping on a freshly prepared drink. Imagine a cup of vibrant colors and refreshing flavors that dances on your taste buds while you gather with friends to root for your favorite team. That’s where this SUPER BOWL Winter Sangria comes into play—a delightful drink that transforms any gathering into a celebration of warmth and camaraderie. Every sip of this SUPER BOWL Winter Sangria brings together the sweetness of fresh fruits and the robust depth of red wine, infused with warming spices. It feels like a big hug on a cold evening, perfect for those exciting game day moments. So put on your favorite jersey, gather your snacks, and let’s get this party started with a sangria that will surely be a hit! Ingredients for SUPER BOWL Winter Sangria Here’s what you’ll need to make this delicious SUPER BOWL Winter Sangria: 1 bottle (750ml) fruity red wine – Choose a Merlot or Zinfandel for their smooth, rich flavors that pair wonderfully with the fruits. 1 cup freshly squeezed orange juice – For a bright, zesty kick, freshly squeezed juice is best, enhancing the overall freshness of the drink. 2 medium apples, chopped – Use crunchy varieties like Granny Smith or Honeycrisp, which add a nice texture and sweetness to the mix. 1 cup fresh cranberries – These little gems not only contribute vibrant color but also a tart punch, balancing the sweetness of the sangria. 3 cinnamon sticks – Providing warm spice notes, cinnamon sticks take this drink to winter wonderland levels. 1 cup sparkling water – Adjust to your liking for that fizzy finish that adds a refreshing twist as you enjoy. How to Make SUPER BOWL Winter Sangria Follow these simple steps to prepare this delicious SUPER BOWL Winter Sangria: Step 1: Gather Your Ingredients Start by rounding up all your ingredients and tools. Grab a large pitcher that can hold all this delightful drink. Make sure your apples are washed, and it’s a good idea to have a cutting board and knife at the ready. Step 2: Add the Fruits Chop the apples into bite-sized pieces and toss them into your pitcher along with the fresh cranberries. Their contrasting textures and colors will make your sangria visually appealing and tasty. Step 3: Pour in the Good Stuff Now it’s time to bring in the fruity red wine and the freshly squeezed orange juice. Pour them over the fruits in the pitcher, and then with a gentle hand, stir everything together. Imagine those lovely flavors mingling like a dance party in a cozy cabin. Step 4: Cinnamon Time Add the cinnamon sticks to the mixture. This is where the magic starts to happen. Let the sangria take a snooze in the refrigerator for at least 2 hours—this is crucial, as it allows all those flavors to get cozy together. Step 5: Final Touches Before serving, pour in the sparkling water for a bubbly finish. Give it one last gentle stir to combine, and hey, feel free to taste! If it’s too strong for your liking, you can always add more sparkling water. Step 6: Serve and Enjoy Serve the sangria over ice for a refreshing twist. Watch your friends’ eyes light up as they take that first sip. Consider garnishing with extra fruit pieces or a sprig of mint for a fancy touch. This SUPER BOWL Winter Sangria is not just a drink; it’s an experience that brings laughter, joy, and those memorable moments of togetherness, all wrapped up in a beautiful glass. So why not make a batch (or two), get comfy, and enjoy the game in style? Cheers to delicious sips and unforgettable times! Perfecting SUPER BOWL Winter Sangria Cooking Process Start by chopping the apples and cranberries, then gather all your ingredients. Combine the red wine and orange juice first before adding the fruit, followed by the cinnamon sticks. Chill for at least two hours to let the flavors meld beautifully. Add Your Touch to SUPER BOWL Winter Sangria Feel free to experiment with this SUPER BOWL Winter Sangria! Swap in your favorite fruits like pears or pomegranates, or substitute apple juice for an extra fruity kick. You can even replace the cinnamon with nutmeg for a unique twist. Storing & Reheating SUPER BOWL Winter Sangria Store any leftover SUPER BOWL Winter Sangria in the refrigerator for up to three days. The flavors will continue to develop. Serve chilled, and add more sparkling water if needed to freshen it up before enjoying. Sharing this recipe with family during last year’s Super Bowl was such a hit! My friends still talk about how refreshing and festive the SUPER BOWL Winter Sangria was, officially cementing my role as the “drink magician” of our gatherings. FAQs About SUPER BOWL Winter Sangria What is SUPER BOWL Winter Sangria? SUPER BOWL Winter Sangria is a festive twist on the classic Spanish beverage, perfect for winter gatherings, especially during the Super Bowl. This vibrant drink combines fruity red wine with fresh orange juice, seasonal fruits like apples and cranberries, and warming spices like cinnamon. The result is a delicious blend of flavors that can easily brighten up any party. Its sparkling twist makes it refreshing and enjoyable for all guests, turning it into a memorable highlight of your Super Bowl celebration. How do I make SUPER BOWL Winter Sangria ahead of time? Making SUPER BOWL Winter Sangria ahead of time is simple and highly recommended for an even better flavor. Prepare the sangria at least two hours before your guests arrive. Combine the red wine, orange juice, apples, cranberries, and cinnamon in a pitcher, stir well, and let it chill in the refrigerator. This resting period allows the flavors to meld beautifully. Just before serving, add sparkling water for that fizzy kick. This way, you’ll have more time to enjoy the game with your friends! Can I customize the
Easy Super Bowl Guacamole Recipe for Your Game Day Party
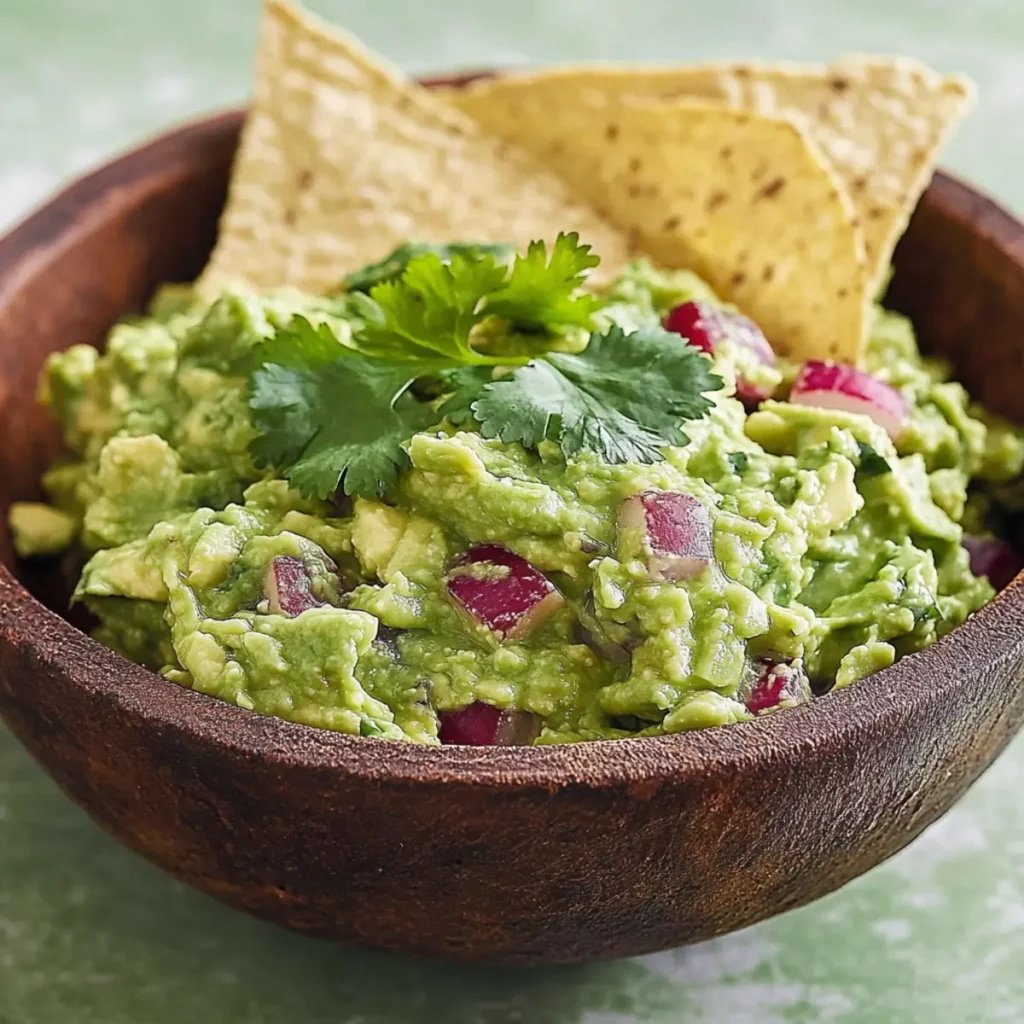
There’s a moment every game day that people look forward to: the delicious spread of snacks, and at the heart of it all is the undeniable star—Super Bowl Guacamole. Rich, creamy avocados blend seamlessly with zesty lime and vibrant veggies, creating a fiesta of flavors that sends taste buds dancing. Picture yourself surrounded by friends, cheerfully yelling at the TV as you dip crispy tortilla chips into this luscious green goodness, savoring each bite with the euphoric joy of a game-winning touchdown. Whether it’s the thrilling Super Bowl Sunday or a casual gathering with friends, nothing says party like a bowl of homemade Super Bowl Guacamole. This recipe is not just a dip; it’s a celebration of fresh ingredients and a touch of flair to spice up any get-together. Let’s take your cooking game to the next level while keeping it fun, easy, and utterly delicious. Ingredients for Super Bowl Guacamole Here’s what you’ll need to make this delicious Super Bowl Guacamole: 3 ripe avocados – Choose avocados that yield slightly to pressure for optimal creaminess. 2 tablespoons freshly squeezed lime juice – Freshly squeezed for a vibrant zing; bottled juice just won’t cut it. 1/4 cup chopped fresh cilantro – Adds a refreshing herbal note to balance the richness of the avocados. 1/4 cup diced red onion – Provides a crunchy texture and mild sweetness that enhances the dip. 1 medium tomato, diced – Juicy and colorful, bringing the flavors and visuals to life. 1 small jalapeño, finely chopped (optional) – If you like a kick, toss this in for some heat! 1/2 teaspoon salt – Enhances all the flavors and brings everything together perfectly. How to Make Super Bowl Guacamole Follow these simple steps to prepare this delicious Super Bowl Guacamole: Step 1: Prepare the Avocados Carefully halve the avocados and remove the pits. Use a spoon to scoop the creamy flesh into a mixing bowl, taking a moment to appreciate that beautiful green hue. Step 2: Mash the Avocados Using a fork or potato masher, mash the avocados to your desired level of creaminess. Some like it smooth, while others enjoy a little chunkiness for texture. Just remember, there’s no wrong way to do this! Step 3: Mix in the Goodies Gently stir in the freshly squeezed lime juice, chopped cilantro, diced red onion, and diced tomato. If you’re inclined to turn up the heat, this is the moment to add the chopped jalapeño too. Step 4: Season It Right Sprinkle in the salt, giving it all a good mix. Make sure to taste as you go, adjusting the seasoning to ensure all flavors pop just the way you want them. Step 5: Let It Chill For the best flavor experience, chill your masterpiece in the refrigerator for about 30 minutes. This little break lets the flavors mingle and deepen, making every bite even more delicious. Step 6: Serve with Style Transfer your Super Bowl Guacamole to a beautiful serving bowl and surround it with crispy tortilla chips. Dive in and enjoy the explosion of flavors that will leave everyone at your gathering begging for more! What’s fantastic about this Super Bowl Guacamole is how incredibly versatile it is. Not only does it shine during big game days, but it’s also perfect for taco nights, summer picnics, or even a casual weekday snack. The creamy texture pairs wonderfully with a variety of foods, whether it’s laying on a classic nacho platter or simply standing alone with some crunchy, salty chips. Plus, it’s packed with healthy fats and fresh ingredients, making it both a delicious and guilt-free option! So this Super Bowl Sunday, as the thrilling game plays out, remember that your guacamole is just as important as the touchdowns. Dive into this recipe and let the flavors take your gathering from ordinary to extraordinary, ensuring that this will be a game day everyone remembers—if only for the food! Happy guacamole-making! This showstopping Super Bowl Guacamole delivers restaurant-quality results using simple ingredients you probably already have at home. The perfect balance of textures and flavors creates an unforgettable dining experience that will have everyone asking for seconds. Picture-perfect presentation with vibrant colors makes this dish absolutely Instagram-worthy and guaranteed to impress any dinner guest. Incredibly versatile recipe that works beautifully for weeknight dinners, meal prep, special occasions, or even outdoor entertaining sessions. Perfecting Super Bowl Guacamole Cooking Process Start by halving the avocados and scooping the flesh into a mixing bowl. Mash until your desired consistency is reached. Add in the lime juice, cilantro, red onion, tomato, and jalapeño next. Finally, season with salt, mixing well before chilling for maximum flavor. Add Your Touch to Super Bowl Guacamole Feel free to get creative with your Super Bowl Guacamole. Try adding diced mango for a fruity twist, or swap in some black beans for extra texture. Spicy fans might appreciate a dash of hot sauce or a sprinkle of smoked paprika to kick things up a notch. Storing & Reheating Super Bowl Guacamole To store your Super Bowl Guacamole, place it in an airtight container with plastic wrap pressed against the surface to limit air exposure. While guacamole is best fresh, it can last in the fridge for 1-2 days. Avoid reheating; enjoy it chilled! When I first whipped up this guacamole for a friend’s Super Bowl party, I was amazed at how quickly it disappeared! Everyone kept asking for the recipe, and I was just glad to finally be the star of the game day spread. FAQs About Super Bowl Guacamole What is Super Bowl Guacamole? Super Bowl Guacamole is a delicious and creamy avocado dip that has become a staple during game day celebrations. With its fresh ingredients like ripe avocados, lime juice, cilantro, and diced vegetables, it offers a flavorful twist for any snack lineup. This versatile dish not only pairs perfectly with tortilla chips but also adds an exciting touch to tacos, burritos, or any appetizer spread. Whether you’re hosting a big game party
Delicious Strawberry Jalapeno Margaritas for a Fun Summer Twist
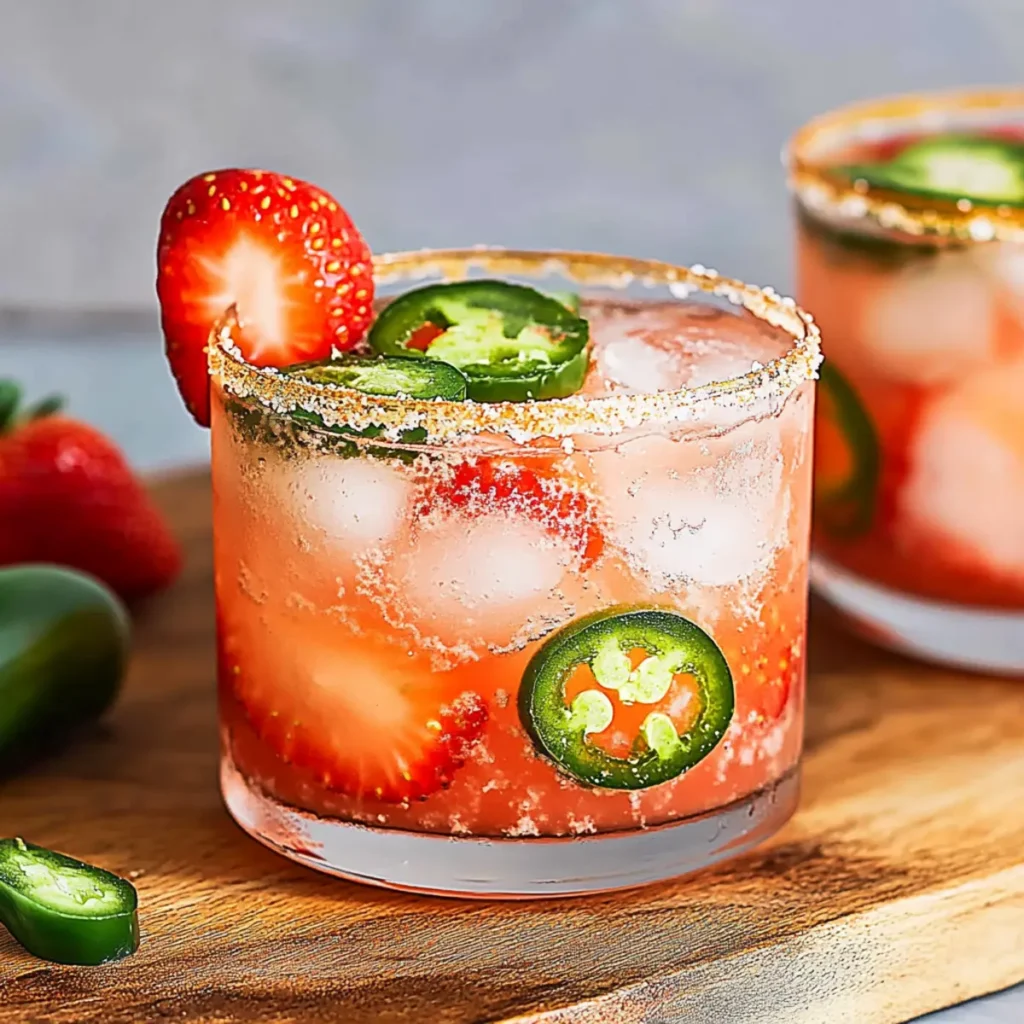
There’s something magical about drinking a refreshing Strawberry Jalapeno Margarita on a warm summer evening. The vibrant colors of ripe, sun-kissed strawberries paired with spicy jalapenos promise a dance of flavors that tickle your taste buds and spark joy in your heart. These Strawberry Jalapeno Margaritas are not just drinks; they’re a celebration, a reason to throw a party, or the perfect excuse to sit back, relax, and sip away your worries. Picture yourself lounging under the warm sun, laughter echoing around you, and every sip of these zesty yet sweet margaritas warming you from the inside out. Whether you’re gathering your friends for a weekend barbecue or treating yourself after a long day, these margaritas are the ideal companion. Get ready for an unforgettable flavor experience that combines the sweetness of strawberries with just the right kick of heat! Ingredients for Strawberry Jalapeno Margaritas Here’s what you’ll need to make this delicious Strawberry Jalapeno Margaritas: 2 cups fresh strawberries – Ensure they are hulled and perfectly ripe for the best flavor. Look for vibrant red berries for sweetness. 1 jalapeno – Sliced and seeds removed for less heat. Adjust based on your spice preference. ½ cup freshly squeezed lime juice – This adds a tart, refreshing zing; always choose fresh over bottled for maximum flavor. ½ cup tequila (preferably blanco) – Opt for a good quality blanco tequila for a smoother taste. 2 tbsp agave syrup – This natural sweetener balances the flavors beautifully; feel free to adjust to your sweetness liking. How to Make Strawberry Jalapeno Margaritas Follow these simple steps to prepare this delicious Strawberry Jalapeno Margaritas: Step 1: Blend the Ingredients In a blender, combine the hulled strawberries, sliced jalapeno, freshly squeezed lime juice, tequila, and agave syrup. Blend on high speed until the mixture is smooth and well combined. Step 2: Taste and Adjust After blending, take a small taste. This is your moment! If you prefer your margaritas sweeter or with a bit more kick, add extra agave syrup or jalapeno slices to suit your palate and blend again. Step 3: Chill Your Glasses For that ultimate refreshing experience, place your glasses in the freezer for a few minutes before serving. If you’re short on time, just fill them with ice to keep your margaritas cool. Step 4: Serve It Up When your glasses are chilled, simply pour the blended mixture into each glass. The vibrant color will make your heart sing! Step 5: Add a Garnish Finish by garnishing with fresh strawberry slices on the rim or a slice of jalapeno for a pop of color and flair. Step 6: Enjoy Responsibly Sit back, relax, and enjoy your Strawberry Jalapeno Margaritas. Remember to sip slowly and appreciate the delightful balance of flavors! This delightful recipe not only brings a refreshing burst of flavor but also serves as a perfect base for creating signature cocktails. You can experiment by adding other fruits like mango or peach, or even replace the jalapeno with another chili for a milder kick. This versatility means you won’t get bored, and you’ll always have something fun to share at your next gathering! So, whether you are unwinding after a hectic week, throwing a vibrant summer party, or simply perfecting your margarita-making skills, these Strawberry Jalapeno Margaritas will undoubtedly become a staple in your drink repertoire. Get ready to impress yourself and others with this refreshing summer twist! Perfecting Strawberry Jalapeno Margaritas Cooking Process For a seamless cooking experience, start by blending strawberries, jalapeno, lime juice, tequila, and agave syrup until smooth. While blending, prepare chilled glasses by freezing them briefly or filling them with ice for the perfect serving temperature. Add Your Touch to Strawberry Jalapeno Margaritas Get creative by swapping fresh strawberries for other berries like raspberries or blackberries. For a tantalizing twist, incorporate fresh mint or basil for an aromatic kick, or adjust the jalapeno level for your preferred spiciness. Storing & Reheating Strawberry Jalapeno Margaritas Store any leftover Strawberry Jalapeno Margaritas in an airtight container in the refrigerator for up to two days. Since this drink is best served fresh, reheating isn’t recommended; instead, enjoy it over ice when ready to serve. It’s funny how the first time I made these Strawberry Jalapeno Margaritas, my friends couldn’t stop raving about them. They claimed I was some kind of cocktail wizard, and honestly, I felt like one, too! FAQs About Strawberry Jalapeno Margaritas What is Strawberry Jalapeno Margaritas? Strawberry Jalapeno Margaritas are a refreshing and zesty cocktail that combines the sweetness of fresh strawberries with the heat of jalapeno peppers. This delightful drink features a balance of flavors, courtesy of freshly squeezed lime juice and high-quality tequila, which makes it perfect for enjoying on warm summer evenings or during festive gatherings. With just a few simple ingredients, you can create a cocktail that impresses your friends and family while adding a fun twist to the classic margarita. Can I adjust the spice level in Strawberry Jalapeno Margaritas? Absolutely! The spice level in Strawberry Jalapeno Margaritas can be easily tailored to suit your taste. If you prefer a milder drink, simply remove the seeds from the jalapeno, as they contain most of the heat. For those who like it spicier, leave some seeds in or even add additional jalapeno slices. You can also try experimenting with other peppers, such as serrano or habanero, for different heat levels and flavor profiles. What types of tequila work best for Strawberry Jalapeno Margaritas? When making Strawberry Jalapeno Margaritas, it’s best to choose a high-quality tequila, preferably blanco or silver tequila. These varieties offer a smooth flavor that pairs excellently with the fruity strawberries and zesty lime juice. While you can use reposado or añejo tequila for added complexity, sticking with blanco tends to create a lighter and more refreshing cocktail that showcases the vibrant flavors of the other ingredients. How can I make Strawberry Jalapeno Margaritas non-alcoholic? Making non-alcoholic Strawberry Jalapeno Margaritas is a breeze. Simply replace the tequila with